Gluten Free Peanut Butter Blondies (Fudgy, High-Protein & Naturally Sweetened)
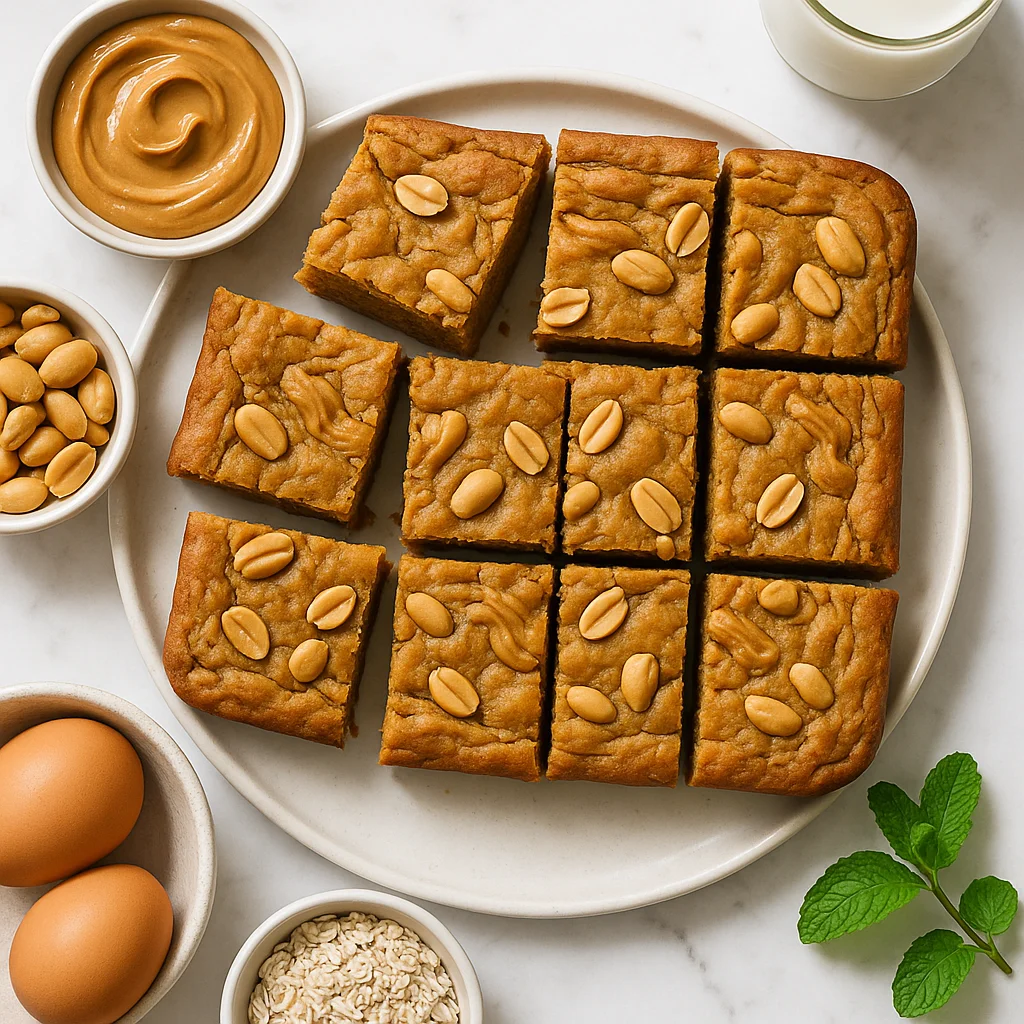
If you have been searching for the perfect gluten free peanut butter blondies, your search ends right here. These blondies are everything a great bar should be, deeply fudgy in the centre, lightly golden on the edges, and packed with that rich, roasted peanut butter flavour that makes it impossible to stop at just one square. Better yet, they are genuinely healthier than anything you will find in a bakery case, made with wholesome ingredients that you likely already have sitting in your pantry right now.
Traditional blondies are typically loaded with refined white flour, cups of brown sugar, and large amounts of butter, which sends both the calorie count and the sugar content through the roof. This healthier version flips that script entirely. Instead of all-purpose flour, we use a combination of oat flour, made simply by blending certified gluten free rolled oats, and almond flour, which together deliver a tender crumb with a meaningful boost of fibre and healthy fats. There is no refined sugar in sight either. Natural maple syrup does the sweetening here, providing just enough caramel-like sweetness without overwhelming the palate or spiking your blood sugar the way white sugar can.
The star of the show, of course, is the peanut butter itself. We call for a natural, drippy-style peanut butter with no added oils or sugar, just ground peanuts and a pinch of salt. This not only keeps the recipe refined-sugar-free but also adds a hefty dose of plant-based protein and heart-healthy monounsaturated fats to every single bar. Each serving clocks in at around 8 grams of protein, making these blondies a genuinely satisfying snack rather than a sugar rush that leaves you crashing an hour later.
One of the best things about this recipe is how effortlessly simple it is to make. Everything comes together in a single mixing bowl in about ten minutes of hands-on time. No electric mixer required, no complicated techniques, and no chilling the dough before baking. You simply whisk together the wet ingredients, peanut butter, eggs, maple syrup and vanilla, then fold in the dry ingredients until a thick, glossy batter forms. Spread it into a lined baking pan, scatter over a handful of dark chocolate chips if you like, and slide it into the oven. In just twenty to twenty-two minutes, your kitchen will smell absolutely incredible.
For anyone managing coeliac disease or a gluten sensitivity, these bars offer real peace of mind. Every single ingredient is naturally gluten free, and as long as you source certified gluten free oat flour (or blend your own from certified gluten free oats), there is no cross-contamination risk to worry about. They are also dairy-free as written, which makes them a great option for anyone avoiding lactose or following a dairy-free lifestyle.
The texture of these gluten free peanut butter blondies is worth talking about on its own. Because there is no gluten network developing in the batter, the bars stay wonderfully tender and almost fudge-like even after they have cooled completely. They do not dry out or turn crumbly the way some gluten free baked goods can. In fact, they actually taste better the next day once the flavours have had time to meld and deepen overnight, if you can resist eating them all first.
One of the most common questions people have about flourless or gluten free blondies is whether the texture will feel gritty, dense, or oddly dry. The answer here is a firm no. The combination of natural peanut butter (which is high in fat and acts as both a binder and a moisture source), almond flour (which contributes richness and a delicate crumb), and oat flour (which provides just enough structure without any toughness) produces a bar that is indistinguishable in texture from a great conventional blondie. The eggs bind everything together and add lift, while the maple syrup keeps the interior moist and contributes a subtle caramel undertone that pairs beautifully with the peanut butter.
Customisation is one of the joys of this recipe. Stir in chopped dark chocolate, a swirl of almond butter, a handful of crushed pretzels for a sweet-salty crunch, or a spoonful of natural jam pressed into the top before baking for a peanut butter and jelly twist. You can also replace a portion of the oat flour with vanilla pea protein powder to push the protein content even higher per bar without affecting the fudgy texture in any meaningful way. The base batter is forgiving and versatile, making it an excellent foundation for your own creative variations.
Whether you are baking these for a post-workout snack, a lunchbox treat, a healthy dessert for friends, or simply because you deserve something delicious and nourishing, these gluten free peanut butter blondies deliver on every front. They prove, in the most satisfying way possible, that eating gluten free and eating healthily does not mean sacrificing the foods you love.
Ingredients
- 240 g natural peanut butter (drippy style, no added sugar or oil — stir well before measuring. Brands with a thicker consistency can make the batter hard to spread; warm the jar briefly in warm water if needed.)
- 80 ml pure maple syrup (grade A or B — do not substitute pancake syrup or table syrup as they contain refined corn syrup and will alter both flavour and texture)
- 2 large eggs (room temperature — cold eggs can cause the peanut butter to seize and create a lumpy batter)
- 2 tsp pure vanilla extract (use pure extract rather than imitation for the best depth of flavour)
- 80 g certified gluten free oat flour (the certified GF label is essential for coeliac safety. To make your own, blend 90g certified GF rolled oats in a high-speed blender for 30–45 seconds until a fine powder forms, then measure out 80g)
- 40 g almond flour (blanched almond flour (not almond meal) gives a finer, more tender crumb. Bob's Red Mill Super-Fine and Anthony's are reliable brands.)
- 1 tsp baking powder (check the label confirms gluten free — some brands share facilities with wheat products)
- 0.3 tsp fine sea salt (skip entirely if your peanut butter is already salted to avoid over-seasoning)
- 60 g dark chocolate chips (70% cocoa or higher for the least sugar and most antioxidant benefit; optional but strongly recommended. Use dairy-free chips (such as Enjoy Life) to keep the recipe dairy-free.)
Instructions
- 1
Preheat your oven to 175°C (350°F). Line an 8x8-inch (20x20 cm) square baking pan with parchment paper, leaving overhang on two sides to act as handles for easy removal.
Lightly grease the two exposed sides of the pan (not covered by parchment) with a little coconut oil or cooking spray to prevent any sticking at the corners.
- 2
In a large mixing bowl, combine the peanut butter, maple syrup, eggs and vanilla extract. Whisk vigorously for about 60 seconds until the mixture is smooth, glossy and fully combined.
Make sure your peanut butter is fully stirred and at room temperature — cold or stiff peanut butter will cause the batter to look curdled or lumpy. If your peanut butter is very thick, place the open jar in a bowl of warm water for 5 minutes to loosen it before measuring.
- 3
Add the oat flour, almond flour, baking powder and salt to the bowl. Using a spatula, fold the dry ingredients into the wet mixture until just combined and no dry streaks remain. The batter will be thick.
Do not overmix once the flours are added — fold gently with a spatula using broad, sweeping strokes. Overworking the batter can make the bars tougher and denser than intended.
- 4
Transfer the batter to the prepared baking pan and use the back of a damp spatula or wet fingers to spread it into an even layer. Scatter the dark chocolate chips evenly over the top and press them in lightly.
The batter is quite thick and sticky — dampening your spatula or fingertips with water every few strokes prevents it from clinging and tearing as you spread. Aim for as even a layer as possible so the bars bake uniformly.
- 5
Bake on the centre rack for 20 to 22 minutes, until the edges look set and lightly golden and the centre appears just barely set — it should have a very slight jiggle when you gently shake the pan.
Do not overbake — this is the single most important rule for fudgy blondies. The bars will look underdone when you pull them out, and that is exactly right. They continue to firm up significantly as they cool, and overbaking by even 3 to 4 minutes will result in a dry, crumbly texture.
- 6
Remove the pan from the oven and allow the blondies to cool completely in the pan on a wire rack — at least 45 minutes to 1 hour. Do not attempt to cut them while warm as they will be too soft.
For the cleanest, most defined slices, transfer the fully cooled pan to the refrigerator for 30 minutes before cutting. Cold blondies hold their shape far better under the knife.
- 7
Lift the slab out of the pan using the parchment overhang. Place on a cutting board and slice into 12 even bars (cut into 3 columns and 4 rows).
Use a sharp chef's knife and wipe it clean with a damp cloth between each cut for neat, bakery-style edges with no dragging or tearing.
Nutrition per serving
195kcal
Calories
8g
Protein
16g
Carbs
12g
Fat
2g
Fibre
8g
Sugar
105mg
Sodium
Pro Tips
- ✓
Use a kitchen scale for accuracy, measuring peanut butter by weight gives far more consistent results than volume. One packed cup can vary by up to 50g depending on how you scoop it.
- ✓
Natural peanut butter brands vary widely in consistency. If your batter looks too thick to spread, add 1 tablespoon of warm water and fold it in until the batter loosens. If it looks too thin, add an extra 10g of oat flour.
- ✓
Do not skip the parchment overhang on two sides, it acts as handles that make lifting the cooled slab out of the pan completely effortless and prevents broken bars.
- ✓
These bars taste even better on day two as the peanut butter flavour deepens and the texture settles into something even more fudgy, bake them the night before if you can wait.
- ✓
For the cleanest bakery-style slices, refrigerate the fully cooled slab for at least 30 minutes before cutting, and wipe your knife clean between each cut.
- ✓
To make your own oat flour, blend 90g of certified gluten free rolled oats in a high-speed blender for 30 to 45 seconds until a fine, powdery flour forms. Measure after blending rather than before for best accuracy.
Frequently Asked Questions
Variations
- •
Peanut Butter Chocolate Swirl Blondies
Melt 40g of dark chocolate with 1 teaspoon of coconut oil. After spreading the batter into the pan, drizzle the melted chocolate over the top and use a toothpick or skewer to swirl it into the batter before baking.
- •
PB&J Blondies
Drop 6 small teaspoons of your favourite reduced-sugar raspberry or strawberry jam over the top of the batter before baking, then use a toothpick to gently swirl each dollop for a peanut butter and jelly effect.
- •
Crunchy Peanut Butter Blondies
Use crunchy natural peanut butter instead of smooth, and fold in 30g of chopped roasted peanuts with the dry ingredients for extra texture and crunch in every bite.
- •
Protein-Boosted Blondies
Replace 20g of the oat flour with an equal amount of unflavoured or vanilla pea protein powder or collagen peptides to increase the protein content per bar without affecting the texture significantly.
Substitutions
- •Maple syrup → Raw honey (Use the same quantity. Honey adds a slightly floral sweetness. Note that this makes the recipe non-vegan.)
- •Maple syrup → Coconut nectar or agave syrup (Both work as a 1:1 swap and keep the recipe vegan and refined-sugar-free.)
- •Almond flour → Certified gluten free oat flour (Increase the total oat flour to 120g and omit the almond flour entirely. The bars will be slightly less rich but still delicious.)
- •Eggs → Flax eggs (Mix 1 tablespoon ground flaxseed with 3 tablespoons water per egg. Rest for 5 minutes before using. Makes the recipe vegan.)
- •Dark chocolate chips → Chopped dried cherries or raisins (For a chocolate-free version, chopped dried fruit adds natural sweetness and chewiness.)
- •Peanut butter → Sunflower seed butter (Makes the recipe nut-free. The bars may develop a greenish tint due to a harmless reaction with baking powder, this does not affect taste or safety.)
🧊 Storage
Store cooled blondies in an airtight container at room temperature for up to 3 days, or refrigerate for up to 7 days. To freeze, wrap individual bars in parchment paper and place in a zip-lock bag or airtight container. Freeze for up to 3 months. Thaw at room temperature for 30 minutes or microwave for 20 seconds.
📅 Make Ahead
These blondies are an excellent make-ahead treat. Bake the full batch, allow to cool completely, then store in the refrigerator overnight. They slice more cleanly when cold and the flavour improves significantly after resting. You can also freeze the entire baked and cooled slab wrapped tightly in plastic wrap and foil for up to 3 months.
More Gluten-Free Desserts Recipes
Lightened-Up Gluten Free No Bake Cheesecake with Almond Date Crust
Gluten-Free Almond Flour Brownies
Light & Fluffy Gluten Free Strawberry Shortcake with Almond Flour Biscuits