Gluten Free Oreo-Style Sandwich Cookies with Vanilla Cashew Cream
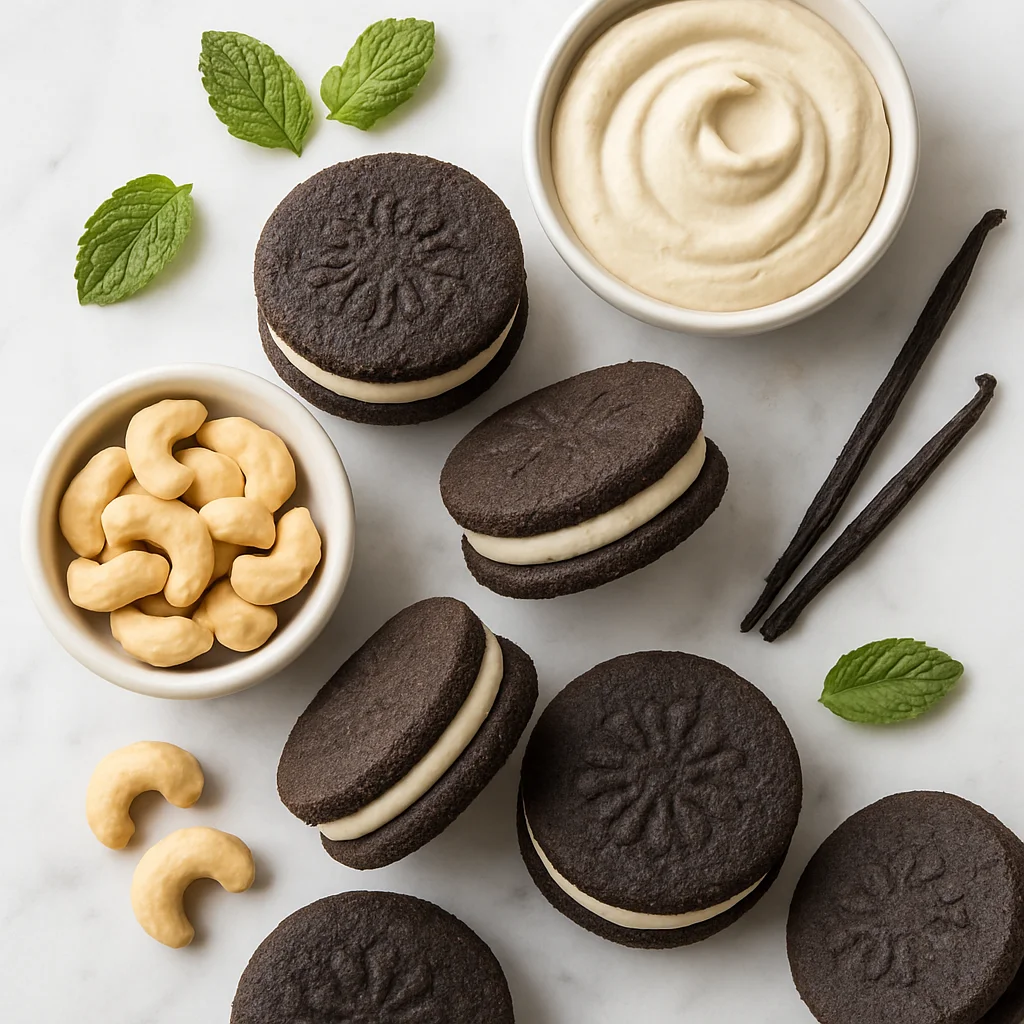
If you have been searching for the perfect gluten free Oreo-style sandwich cookies, your quest ends right here. These homemade chocolate sandwich cookies deliver everything you love about the classic treat, the deep cocoa snap, the pillowy cream filling, the satisfying twist-and-lick ritual, without the gluten, refined flour, or excessive sugar that make traditional versions a once-in-a-while indulgence at best. Made with a thoughtful blend of almond flour and oat flour, these cookies are genuinely healthier than anything you will find in a supermarket cookie aisle, yet they taste indulgent enough to fool even the most devoted Oreo fan.
What makes these gluten free Oreo-style sandwich cookies stand out from other recipes is the attention to both flavour and nutrition. The chocolate wafers are made with Dutch-process cocoa powder for an intense, dark colour and bold chocolate flavour that mimics the signature near-black Oreo wafer. Almond flour adds healthy fats and a satisfying richness while keeping the cookies naturally gluten free and grain free (if you use the all-almond-flour option). A small amount of certified gluten free oat flour contributes structure and a mild earthy quality that rounds out the cocoa beautifully. The dough is sweetened with pure maple syrup and a touch of coconut sugar, bringing real caramel depth without relying on large amounts of refined white sugar.
It is worth pausing to look at what goes into store-bought gluten free Oreos: the first ingredient is sugar, followed by white rice flour, tapioca starch, palm oil, canola oil, cornstarch, and artificial flavour. Even the healthier store-bought alternatives typically rely on seed oils, gums, and highly processed starches to achieve that familiar texture. This homemade version sidesteps all of that. Every single ingredient is one you can pronounce, find at a health food store, and feel genuinely good about eating.
The vanilla cashew cream filling is where this recipe truly shines. Soaked raw cashews are blended with a splash of vanilla extract, a little coconut oil, and a drizzle of maple syrup to produce a silky, ivory-coloured cream that pipes perfectly and sets firmly enough to hold its shape. Compared to traditional Oreo filling, which is primarily made from shortening and powdered sugar, this cashew-based alternative provides plant-based protein, healthy unsaturated fats, and a subtly sweet flavour that is not cloying. You would never guess it is dairy free.
These cookies were designed with health-conscious home bakers in mind. Each sandwich cookie comes in at a fraction of the sugar found in commercial versions, and the fibre content from almond flour and oat flour is meaningfully higher than what refined white flour would provide. They are naturally gluten free, completely dairy free, and free from artificial colours, flavours, and preservatives. Whether you follow a gluten free diet out of necessity due to coeliac disease or gluten sensitivity, or whether you simply prefer to eat more wholesome foods, this recipe fits beautifully into a balanced lifestyle.
From a baking perspective, these cookies are deeply satisfying to make. Rolling the dough between sheets of parchment paper keeps it mess-free and ensures an even thickness for uniform baking. A small round cutter, about 4 to 5 centimetres in diameter, gives you the classic Oreo silhouette. The cookies bake up firm and crisp, and they continue to set as they cool, so do not be tempted to overbake them. Once cooled completely, the cashew cream filling is piped onto one wafer and sandwiched with another, then the assembled cookies are chilled briefly to let everything firm up into perfect little rounds.
These gluten free Oreo-style sandwich cookies are also wonderfully versatile. They hold up beautifully when dunked in cold oat milk or almond milk, making them ideal for the classic twist-and-dunk experience. They work well as a party treat, a lunchbox snack, or a thoughtful homemade gift. You can even crumble them over yoghurt, blend them into a smoothie, or use them as a base for a gluten free cheesecake crust, the same way you might use traditional Oreos in a no-bake pie.
For those with additional dietary considerations, this recipe is straightforward to adapt. Swapping the cashew filling for a coconut cream-based alternative makes the recipe nut free. Using a certified gluten free oat flour brand ensures the recipe is safe for those with coeliac disease, this is non-negotiable, as standard oat flour is frequently cross-contaminated with wheat. The cookies are already vegan-friendly as written, making them a crowd-pleasing option for mixed gatherings where guests follow different eating styles. For a fully grain free version, simply replace the oat flour with additional almond flour or tigernut flour.
One of the most rewarding things about making your own gluten free Oreo-style sandwich cookies at home is knowing exactly what goes into them. No mystery ingredients, no hydrogenated oils, no artificial vanilla flavouring, no seed oils, just wholesome, real-food ingredients that you can feel good about eating and serving. The process takes a little time, but each step is simple and achievable for bakers of any level. Make a batch on the weekend and you will have a week's worth of genuinely satisfying treats ready to go. Once you taste how good the homemade version is, the supermarket aisle will hold very little appeal.
Ingredients
- 1 cups blanched almond flour (packed and levelled — must be blanched (skin-free) almond flour, not almond meal, for the smoothest wafer texture)
- 1 cup certified gluten free oat flour (must be labelled certified gluten free to avoid wheat cross-contamination; sub with more almond flour for grain free or tigernut flour for paleo)
- 1 cup Dutch-process cocoa powder (unsweetened, sifted — Dutch-process (alkalized) is strongly preferred over natural cocoa for the deep colour and mellow chocolate flavour characteristic of an Oreo-style wafer)
- 3 tbsp coconut sugar (adds caramel depth; sub with maple sugar or date sugar at a 1:1 ratio)
- 1 tsp fine sea salt
- 1 tsp baking soda (helps the wafers puff very slightly and set with a crisp edge)
- 3 tbsp pure maple syrup (grade A or B; adds moisture and sweetness to the dough — do not substitute with liquid stevia or the dough consistency will change)
- 3 tbsp melted coconut oil (refined for neutral flavour; unrefined adds a mild coconut taste which some people enjoy — vegan butter also works)
- 1 tsp pure vanilla extract (divided — 1/2 tsp goes into the wafer dough and 1/2 tsp into the cashew cream filling)
- 1 cup raw cashews (soaked in cold water for at least 4 hours (or covered in boiling water for 1 hour if short on time), then thoroughly drained and rinsed — soaking is non-negotiable for a silky smooth filling)
- 3 tbsp pure maple syrup (for the filling; adjust to taste — reduce by 1 tsp for a less sweet filling)
- 2 tbsp melted coconut oil (for the filling; helps the cream set firm when chilled so the cookies hold their shape)
- 2 tbsp unsweetened oat milk (or almond milk; add an extra teaspoon at a time if your blender struggles — the filling should be thick and spoonable, not pourable)
- 1 tsp pure vanilla extract (for the filling — use pure extract rather than imitation vanilla for the cleanest flavour)
- 1 pinch fine sea salt (for the filling; balances the sweetness and makes the vanilla flavour pop)
Instructions
- 1
Soak the raw cashews: Place cashews in a bowl, cover with cold water, and soak for at least 4 hours or overnight. Drain and rinse thoroughly before using. This step is essential for a silky smooth filling.
For a quick soak, cover cashews with boiling water and soak for 1 hour instead. An overnight cold soak in the fridge produces the silkiest result if you have the time.
- 2
Preheat your oven to 325°F (165°C) and line two baking sheets with parchment paper.
A lower baking temperature prevents the almond flour from browning too quickly and keeps the wafers a deep chocolate colour rather than looking burnt at the edges.
- 3
Make the cookie dough: In a large mixing bowl, whisk together the almond flour, oat flour, cocoa powder, coconut sugar, salt, and baking soda until evenly combined and no lumps remain.
Sifting the cocoa powder prevents bitter lumps in the finished dough and ensures the dry ingredients combine evenly. Do not skip this if your cocoa is at all clumpy.
- 4
Add the maple syrup, melted coconut oil, and 1/2 teaspoon of vanilla extract to the dry ingredients. Mix with a spatula until a firm, cohesive dough forms. The dough should hold together when pressed. If it feels too dry, add 1 teaspoon of cold water at a time.
If the dough feels oily rather than dry, your coconut oil may have been too hot. Allow it to cool to just-melted before adding. The dough should feel like firm play-dough — not sticky, not crumbly.
- 5
Divide the dough in half. Place one portion between two sheets of parchment paper and roll to an even 3mm (about 1/8 inch) thickness. Repeat with the second portion. Slide the rolled dough (still between parchment) onto a flat tray and refrigerate for 15 minutes to firm up.
Chilling the rolled dough makes cutting shapes much easier and prevents spreading during baking. If the dough starts to warm up and become sticky while you are cutting, slide it back into the fridge for 5 minutes.
- 6
Remove the chilled dough from the fridge. Using a 4.5cm (about 1 3/4 inch) round cookie cutter, cut out as many rounds as possible. Re-roll scraps between parchment and cut again. You should get approximately 28 rounds total.
Dip your cookie cutter in cocoa powder between cuts to get clean edges without sticking. A thin metal spatula helps transfer delicate rounds to the baking sheet without distorting them.
- 7
Arrange the cookie rounds on the prepared baking sheets, spacing them about 2cm apart. Bake for 12 to 14 minutes, until the edges look set and the tops feel dry to the touch. Do not overbake — they will firm up significantly as they cool.
Rotate the trays halfway through baking for even results. The cookies should look dry on top and feel just set at the edges — they will be slightly soft in the centre but will firm up dramatically as they cool on the rack.
- 8
Transfer the cookies to a wire rack and allow them to cool completely — at least 20 minutes. They must be fully cool before filling or the cream will melt.
Resist the urge to move the cookies before they have cooled fully — they are fragile when hot. Once completely cooled they become noticeably firmer and more Oreo-like in snap.
- 9
Make the cashew cream filling: Add the drained soaked cashews, maple syrup, melted coconut oil, oat milk, vanilla extract, and salt to a high-speed blender. Blend on high for 2 to 3 minutes, scraping down the sides as needed, until the mixture is completely smooth and creamy with no cashew graininess.
A high-speed blender like a Vitamix gives the smoothest result. A food processor will work but may leave the filling slightly less silky — blend for an extra minute and scrape down the sides frequently. Make sure your cashews are fully drained so the filling is not watery.
- 10
Transfer the cashew cream to a small bowl and refrigerate for 15 to 20 minutes to thicken slightly. It should have a thick, pipeable consistency similar to soft buttercream.
If the filling looks too thin after blending, it is likely because your cashews released a lot of water. Refrigerate for 25 to 30 minutes rather than 15 and it will thicken up nicely. In a warm kitchen you can also pop it in the freezer for 10 minutes.
- 11
Assemble the sandwich cookies: Spoon or pipe about 1 teaspoon of cashew cream filling onto the flat side of one cookie. Press a second cookie on top, flat side down, and gently squeeze until the filling reaches the edges. Repeat with remaining cookies.
A piping bag with a small round tip gives the most even and professional-looking filling. If you do not have one, a zip-lock bag with a small corner snipped off works perfectly. Aim for about 1 heaped teaspoon of filling per cookie — enough to reach the edges when pressed but not so much that it squeezes out messily.
- 12
Place assembled sandwich cookies on a tray and refrigerate for at least 30 minutes to allow the filling to firm up before serving. Enjoy straight from the fridge or let sit at room temperature for 5 minutes for a softer bite.
For cleaner slices and a firmer bite, chill the assembled cookies for up to 1 hour rather than the minimum 30 minutes. This is especially important in warm weather or if your kitchen runs hot.
Nutrition per serving
162kcal
Calories
4g
Protein
14g
Carbs
11g
Fat
2g
Fibre
7g
Sugar
58mg
Sodium
Pro Tips
- ✓
Always use blanched almond flour (not almond meal or ground almonds) for the smoothest, crispest wafers. Almond meal has the skins still in it and produces a grainier, more crumbly texture that will not mimic an Oreo wafer.
- ✓
Dutch-process cocoa is essential here, it has been treated with alkali, giving it that deep near-black colour and mellow, rich chocolate flavour that defines an Oreo-style wafer. Natural cocoa is more acidic and produces a lighter, redder result. It is worth seeking out a quality brand.
- ✓
The longer you soak the cashews, the silkier the filling will be. If you are short on time, a one-hour hot soak (covering cashews with just-boiled water) works, but an overnight cold soak in the fridge produces noticeably smoother results.
- ✓
Do not skip chilling the rolled dough before cutting. Almond flour doughs are soft and warm dough will distort when you cut shapes and transfer them to the baking sheet, causing spreading and misshapen cookies. Even 15 minutes in the fridge makes a significant difference.
- ✓
Measure your almond flour correctly: spoon it into the measuring cup and level off the top with a straight edge. Scooping directly from the bag compacts the flour and can lead to dry, crumbly dough that will not hold together.
- ✓
If your kitchen is warm, refrigerate the assembled cookies for at least 45 minutes rather than 30, a longer chill ensures the cashew cream firms up fully so the cookies hold their shape cleanly when you bite into them or serve them to guests.
Frequently Asked Questions
Variations
- •
Keto Sandwich Cookies
Replace the oat flour with additional almond flour and substitute the maple syrup with 2 tablespoons of powdered erythritol plus 1 tablespoon of water in the wafer dough. Use powdered erythritol blended with coconut cream for the filling instead of cashew cream and maple syrup.
- •
Nut-Free Version
Replace the almond flour with certified gluten free sunflower seed flour (grind sunflower seeds in a blender) and use soaked sunflower seeds in place of cashews for the filling. Note that sunflower seed flour can turn green when it reacts with baking soda, add a teaspoon of lemon juice to the dough to prevent this.
- •
Peppermint Cream Oreo-Style Cookies
Add 1/2 teaspoon of pure peppermint extract to the cashew cream filling and reduce vanilla to 1/4 teaspoon. This gives a refreshing mint flavour reminiscent of Oreo Mint Creme cookies.
- •
Double Chocolate
Stir 2 tablespoons of melted dark chocolate (85% cacao) into the cashew cream filling before chilling for a chocolate-on-chocolate experience with added antioxidants.
Substitutions
- •Oat flour → Additional almond flour or tigernut flour (Tigernut flour keeps the recipe paleo and grain free. Extra almond flour results in a richer, slightly more tender wafer.)
- •Coconut sugar → Maple sugar or date sugar (Both are unrefined alternatives with a similar caramel depth. Date sugar is higher in fibre.)
- •Maple syrup → Raw honey or date syrup (Honey works well though it makes the recipe non-vegan. Date syrup adds more depth of flavour and extra fibre.)
- •Coconut oil → Vegan butter (such as Miyoko's or Earth Balance) (Vegan butter gives a slightly richer flavour in both the wafers and the filling.)
- •Raw cashews → Macadamia nuts or coconut cream (Macadamia nuts produce an equally silky filling. Thick coconut cream from a chilled can is great for a nut-free, lighter option.)
- •Oat milk → Almond milk or coconut milk (Any unsweetened plant-based milk works here. Coconut milk produces a slightly richer filling.)
🧊 Storage
Store assembled sandwich cookies in an airtight container in the refrigerator for up to 4 days. The wafers will soften slightly over time as they absorb moisture from the filling, which many people enjoy. For longer storage, freeze for up to 2 months. Unassembled baked wafers can be kept at room temperature in an airtight container for up to 3 days.
📅 Make Ahead
The chocolate wafers can be baked up to 3 days ahead and stored at room temperature in an airtight container. The cashew cream filling can be prepared up to 48 hours in advance and kept refrigerated in a sealed jar, re-whisk before piping if it has stiffened. You can also freeze baked wafers for up to 1 month; thaw at room temperature before assembling.
More Gluten-Free Desserts Recipes
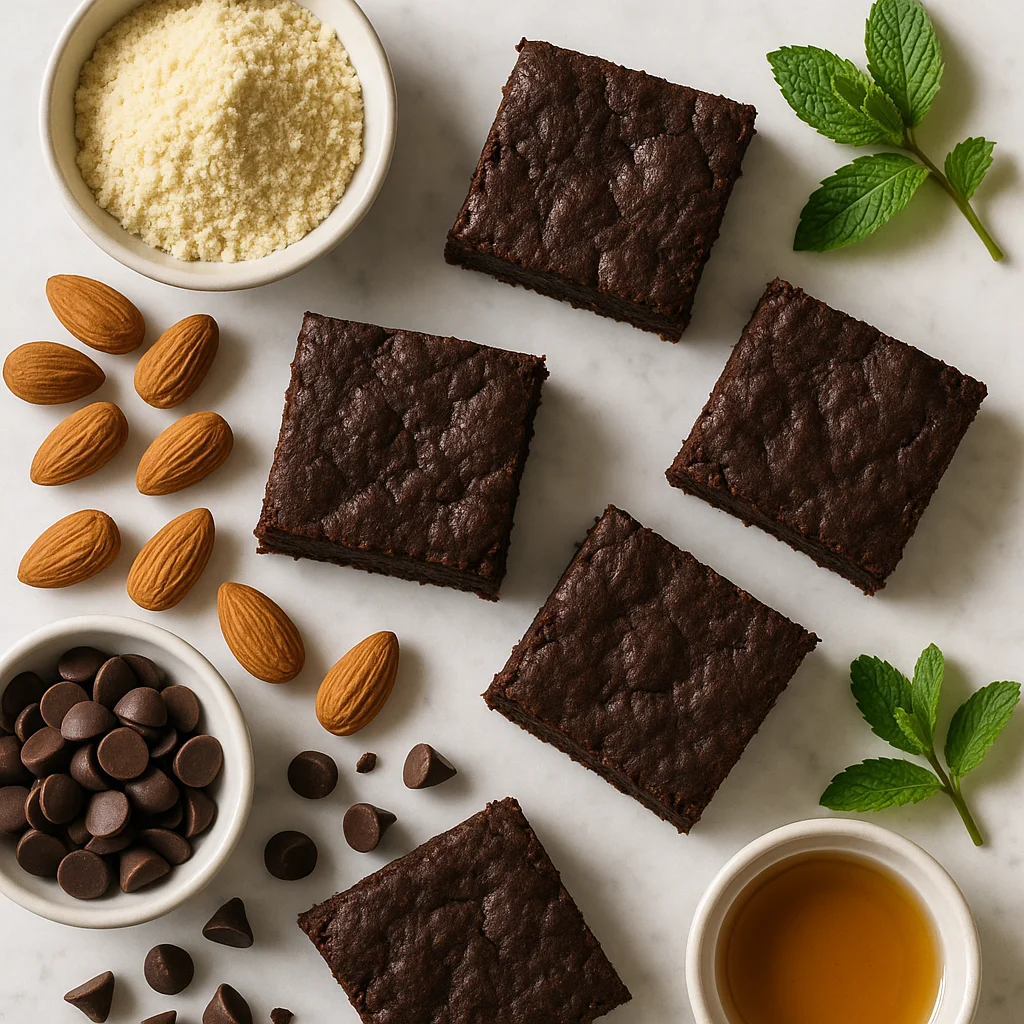
Lightened-Up Gluten Free No Bake Cheesecake with Almond Date Crust

Light & Fluffy Gluten Free Strawberry Shortcake with Almond Flour Biscuits
Gluten Free Peanut Butter Blondies (Fudgy, High-Protein & Naturally Sweetened)