Healthy Japanese Strawberry Daifuku Mochi with Coconut Cream Filling
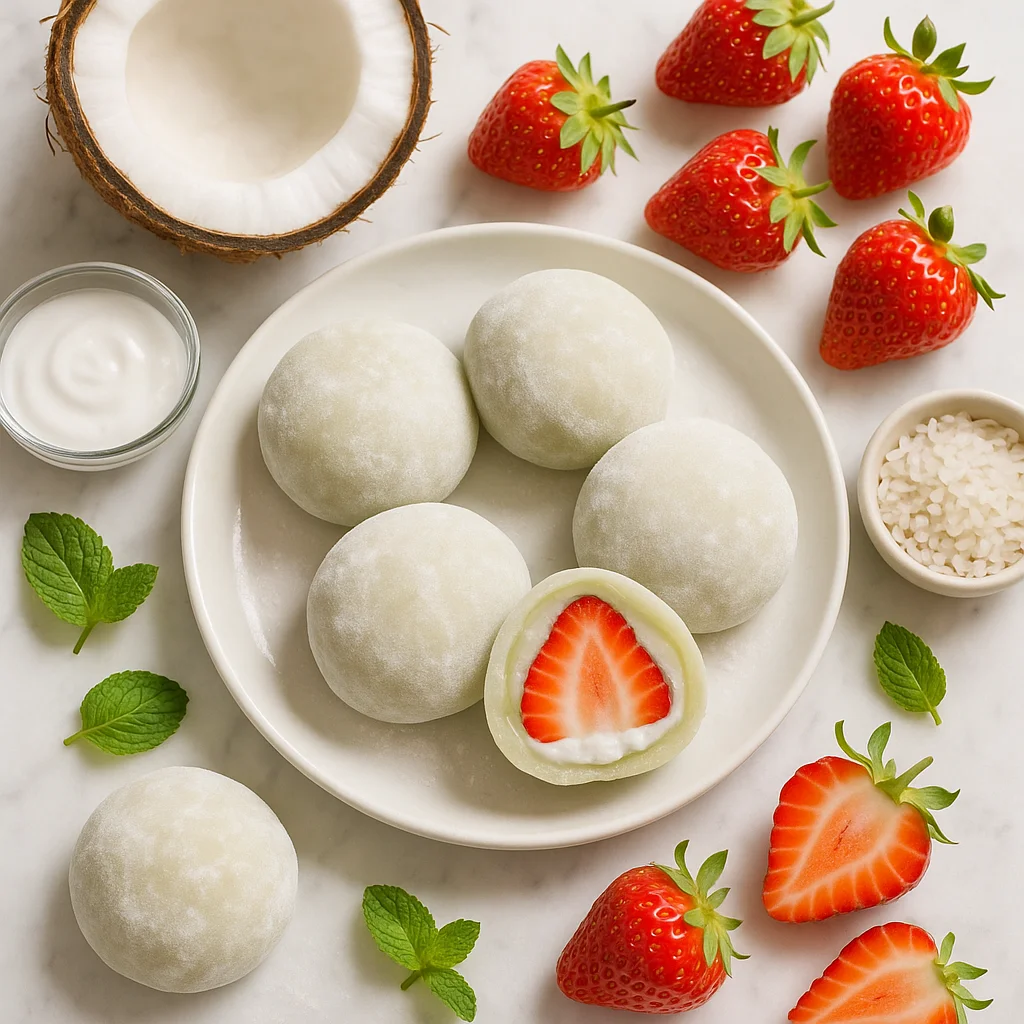
If you have ever wandered through a Japanese confectionery shop and marvelled at those perfectly round, pillowy sweets cradling a plump fresh strawberry, you already know the magic of Japanese strawberry daifuku mochi. Daifuku, which literally translates to 'great luck,' is one of Japan's most iconic wagashi, traditional confections that have been enjoyed for centuries. The classic version, known as ichigo daifuku, wraps a whole strawberry and a generous dollop of anko (sweet red bean paste) inside a soft glutinous rice cake shell. While undeniably delicious, traditional daifuku mochi can be high in refined sugar and calories. This healthier take keeps everything you love about the original, the pillowy chew, the juicy strawberry centre, the silky filling, while cutting back significantly on sugar and adding nourishing ingredients that make every bite something to feel good about.
This recipe uses glutinous rice flour, also known as sweet rice flour or mochiko, as its base. Despite the name, glutinous rice flour contains no gluten, making it naturally gluten-free and suitable for those with coeliac disease or gluten sensitivity. It is the key ingredient that gives mochi its signature stretchy, chewy texture that simply cannot be replicated with any other flour. In traditional mochi-making, a labour-intensive ceremony called mochitsuki involves soaking and steaming whole mochigome rice before pounding it with large mallets in a mortar, a two-person ritual that is extraordinary to witness. At home, mochiko flour replicates that same sticky, elastic quality in a fraction of the time.
Rather than loading the dough with white sugar, we sweeten it lightly with a small amount of pure maple syrup and a touch of coconut milk, which has a lower glycaemic impact than refined sugar and provides a gentle, neutral sweetness that does not overpower the delicate strawberry flavour. It is worth knowing that sugar plays a functional role in mochi beyond flavour, it keeps the shell soft and pliable. By using maple syrup rather than granulated sugar, we preserve that softening function while using a less refined sweetener with additional trace minerals.
Instead of traditional anko filling, which requires lengthy cooking and significant amounts of sugar, this recipe features a lightly sweetened coconut cream filling. Full-fat coconut cream is whipped until thick and cloud-like, then combined with a small amount of pure maple syrup and a pinch of vanilla. The result is a filling that is dairy-free, naturally sweetened, and genuinely creamy without any artificial ingredients. For best results, refrigerate your can of coconut cream overnight, only the thick, solid portion that rises to the top should be used; discard or save the watery liquid for smoothies. If you do love the idea of a bean-based filling, the variations section below includes a homemade lower-sugar white bean cream that works beautifully and adds an impressive protein and fibre boost.
The strawberries themselves are the heart of this recipe. Choose the freshest, most fragrant strawberries you can find, ideally small to medium in size so they fit neatly inside the mochi shell without creating too much bulk. Uniformity matters here: similarly sized strawberries mean consistently sized mochi, which is both visually appealing and practical when portioning the dough. The sweetness and acidity of a ripe strawberry cuts beautifully through the neutral chewiness of the mochi and the richness of the coconut cream filling, creating a balance of flavours that feels both refreshing and indulgent.
Making mochi at home does require a little patience and practice, but this recipe has been designed to be as approachable as possible for home cooks. The mochi dough is cooked in the microwave, which is the quickest and most reliable method for achieving a smooth, lump-free result. The key visual cue to look for is the dough turning from a chalky, opaque white to a glossy, translucent appearance with no white raw patches, this tells you the starch has fully gelatinised. If you do not have a microwave, a stovetop method using a double boiler is included in the tips section. Because mochi dough is naturally extremely sticky, this is completely normal and not a sign that anything has gone wrong, dusting your work surface generously with potato starch or tapioca starch is essential. Do not be tempted to use less than the recipe suggests or you will find yourself in a very sticky situation.
From a nutritional standpoint, each piece of this healthy Japanese strawberry daifuku mochi comes in at approximately 85 calories, compared to around 130 to 150 calories in a traditional version. The sugar content has been reduced by roughly 40 percent, and because the coconut cream filling adds a small amount of healthy fat, these mochi are satisfying in a way that ultra-sweet confections often are not. Strawberries also contribute meaningful amounts of vitamin C, fibre, and antioxidants, so you are genuinely nourishing your body with every bite.
Daifuku mochi are best enjoyed on the day they are made, as the mochi shell tends to firm up and lose its characteristic softness as it sits. However, the components can be prepared ahead of time, see the make-ahead notes for guidance. These beautiful little sweets make a stunning dessert for dinner parties, a thoughtful homemade gift, or simply a weekend baking project that will delight anyone lucky enough to taste the results. Whether you are new to Japanese sweets or a longtime daifuku devotee looking for a healthier version, this recipe is your new go-to.
Ingredients
- 150 g glutinous rice flour (mochiko or sweet rice flour) (ensure certified gluten-free if needed; look for Koda Farms mochiko or Erawan brand — regular rice flour will not work)
- 2 tbsp pure maple syrup (or rice malt syrup; sugar helps keep mochi pliable so do not reduce further)
- 180 ml water (room temperature; filtered water gives the cleanest flavour)
- 1 tsp vanilla extract (pure extract preferred over imitation for best flavour)
- 1 tbsp unsweetened coconut milk (adds subtle coconut flavour and helps keep the mochi shell soft; full-fat variety preferred)
- 1 pinch fine sea salt (brightens the overall flavour of the dough)
- 60 g potato starch or tapioca starch (for dusting — do not skip and do not be shy; use far more than you think you need)
- 200 ml full-fat coconut cream (refrigerate the can overnight; use only the thick solid portion that rises to the top — discard or save the watery liquid for smoothies)
- 1.5 tbsp pure maple syrup (for the filling; adjust to taste depending on the sweetness of your strawberries)
- 0.5 tsp vanilla extract (for the filling)
- 10 small to medium fresh strawberries (hulled and patted very dry; choose uniform sizes for evenly shaped mochi — avoid large strawberries as they are difficult to wrap)
Instructions
- 1
Prepare the coconut cream filling first. Scoop the chilled full-fat coconut cream (the thick solid portion only) into a medium bowl. Add 1.5 tablespoons maple syrup and 0.5 teaspoon vanilla extract. Whip with a hand mixer or whisk until thick and fluffy, about 2 to 3 minutes. Cover and refrigerate while you prepare the mochi dough.
Chill your mixing bowl in the freezer for 10 minutes before whipping for the fluffiest, most stable coconut cream. If the cream is too soft to whip, return the can to the fridge for another hour.
- 2
Hull your strawberries and pat them very thoroughly dry with paper towel. Any moisture on the surface will prevent the filling from adhering. Set aside on a clean tray.
Choose strawberries that are as uniform in size as possible — this ensures each mochi piece is the same size and makes portioning the dough much easier. Small to medium strawberries are ideal; very large ones are difficult to encase without the mochi shell tearing.
- 3
Take each strawberry and spoon about one teaspoon of whipped coconut cream into a small disc in your palm. Wrap the coconut cream around the tip of the strawberry, covering it completely. Place on a lined tray and freeze for 20 minutes until firm.
Freezing the coconut-cream-coated strawberries is the single most important step for easy assembly. A firm filling holds its shape and makes wrapping the delicate mochi dough far more manageable. Do not skip this step.
- 4
While the strawberries chill, make the mochi dough. In a large microwave-safe bowl, whisk together the glutinous rice flour, 2 tablespoons maple syrup, water, vanilla extract, coconut milk, and pinch of salt until completely smooth with no lumps.
Strain the mixture through a fine mesh sieve if you notice any lumps for a perfectly smooth, lump-free dough. A smooth batter means an even-textured mochi shell.
- 5
Cover the bowl loosely with plastic wrap or a microwave-safe lid, leaving a small gap for steam to escape. Microwave on high for 2 minutes. Remove, uncover carefully (steam will be hot), and stir vigorously with a wet silicone spatula. Re-cover and microwave for a further 1 to 2 minutes until the dough is fully cooked — it should look translucent, glossy, and very sticky with no white raw patches remaining.
The key visual cue is the colour change: fully cooked mochi dough turns from opaque white to a glossy, semi-translucent appearance. Any remaining white patches mean the starch has not fully gelatinised — microwave in additional 30-second intervals until completely translucent. All microwaves vary in power, so check frequently after the first 2 minutes.
- 6
Dust your work surface very generously with potato starch or tapioca starch. Turn the hot mochi dough out onto the dusted surface. Dust the top of the dough generously as well. Allow to cool for 3 to 4 minutes until comfortable to handle — it should be warm but not burning.
Use far more starch than feels necessary — a thick, even layer on all surfaces. The starch does not make the finished mochi taste floury; it simply prevents the dough from sticking and is brushed off before serving.
- 7
Divide the mochi dough into 10 equal portions using a starch-dusted bench scraper or knife. Working with one portion at a time (keep others covered with a damp cloth), flatten each piece into a round disc approximately 8 to 9 cm in diameter using your fingertips.
Work quickly — mochi is easiest to shape while it is still slightly warm. Make the edges of each disc thinner than the centre, as the edges will stack up when you gather them around the strawberry and you want an even thickness throughout the finished shell.
- 8
Retrieve the frozen strawberries from the freezer. Place one coconut-cream-coated strawberry in the centre of a mochi disc, tip pointing downward. Gather the edges of the mochi up and around the strawberry, pinching firmly to seal. Roll gently between your palms to smooth. Place sealed-side down on a starch-dusted tray. Repeat with remaining pieces.
If the mochi tears, simply patch with a small piece of spare dough — it will hold once sealed. If the dough begins to feel unworkable, cover remaining portions with a damp cloth and allow to rest for 30 seconds before continuing.
- 9
Allow the finished mochi to rest at room temperature for 10 minutes so the filling softens slightly from frozen to a creamy texture. Serve immediately or within 4 to 5 hours for the best texture.
Before plating, gently brush off any excess starch from the surface of each mochi with a dry pastry brush or clean fingers for a beautiful, smooth appearance. Dust lightly with a little extra starch only if the surface feels tacky.
Nutrition per serving
85kcal
Calories
1.4g
Protein
16g
Carbs
2.1g
Fat
0.8g
Fibre
4.2g
Sugar
22mg
Sodium
Pro Tips
- ✓
Do not substitute regular rice flour or all-purpose flour for glutinous rice flour, the texture will be completely different and will not be stretchy or chewy. Mochiko (Koda Farms brand) and Erawan brand sweet rice flour are both widely available and work perfectly.
- ✓
If you do not have a microwave, cook the mochi dough in a heatproof bowl set over a saucepan of simmering water, stirring constantly for 12 to 15 minutes until the dough turns fully translucent and glossy. This stovetop method takes longer but produces an equally good result.
- ✓
Work quickly once the mochi dough is portioned, it becomes less pliable as it cools completely. If the dough stiffens before you finish wrapping, cover the remaining portions with a damp cloth and let them rest for 30 seconds; they will become slightly more workable again.
- ✓
Sugar is not just for sweetness in mochi, it also keeps the shell soft and pliable. If your finished mochi shell feels tougher than expected, you can increase the maple syrup to 2.5 tablespoons next time without the result becoming overly sweet.
- ✓
Tapioca starch and potato starch are both excellent for dusting and do not affect the flavour. Cornstarch also works as a substitute. Apply starch liberally, far more than you think you need, to your hands, the work surface, and the top of the dough.
- ✓
For a pastel pink mochi shell, stir one teaspoon of beet powder into the dry glutinous rice flour before adding liquid. For a green matcha shell, add 1.5 teaspoons of ceremonial-grade matcha powder. Both add visual drama and subtle flavour without any artificial colouring.
Frequently Asked Questions
Variations
- •
Matcha Mochi Shell
Add 1.5 teaspoons of high-quality ceremonial matcha powder to the dry glutinous rice flour before mixing in the liquid. This creates a beautiful green shell with a subtle earthy flavour that pairs wonderfully with the sweet strawberry filling and adds antioxidant benefits.
- •
Lower-Sugar White Bean Filling
Blend 200g of cooked and drained cannellini beans with 1 tablespoon maple syrup, 0.5 teaspoon vanilla, and a pinch of salt until completely smooth. Use in place of the coconut cream filling for a higher-fibre, higher-protein option that is lower in fat and closer to traditional anko in texture.
- •
Black Sesame Mochi
Add 2 tablespoons of black sesame paste to the mochi dough for a dramatic dark grey shell with a rich, nutty flavour. Sprinkle toasted black sesame seeds on the finished mochi for presentation. This variation adds healthy fats and minerals.
- •
Raspberry Daifuku
Substitute fresh raspberries for strawberries for a more tart flavour profile and a smaller, bite-sized mochi. Raspberries are even higher in fibre than strawberries and add a beautiful jewel-like appearance when you bite in.
Substitutions
- •Glutinous rice flour → No direct substitute (There is no substitute for glutinous rice flour in mochi. Regular rice flour, all-purpose flour, and almond flour will all produce a completely different and unsatisfactory texture.)
- •Full-fat coconut cream → Cashew cream (Soak 100g of raw cashews in water overnight, drain, and blend with 1 tablespoon maple syrup and a splash of water until completely smooth. Chill before using as a filling.)
- •Maple syrup → Rice malt syrup or agave nectar (Rice malt syrup has a lower glycaemic index. Agave provides a slightly sweeter flavour. Adjust quantity to taste as sweetness levels vary between liquid sweeteners.)
- •Potato starch (dusting) → Tapioca starch or cornstarch (All three work equally well as a dusting starch and do not affect the flavour of the finished mochi.)
- •Fresh strawberries → Fresh raspberries or fresh blueberries (Use whole raspberries for a tartly flavoured variation, or group 3 to 4 blueberries together for small bite-sized mochi with a mild, sweet flavour.)
🧊 Storage
Store assembled mochi in an airtight container at room temperature and consume within 4 to 5 hours for the best texture. If storing overnight, keep at room temperature (not the fridge) for up to 24 hours, though the shell will firm slightly. Do not freeze assembled mochi as the strawberry will release moisture when thawed.
📅 Make Ahead
The whipped coconut cream filling can be made up to 24 hours ahead and stored covered in the refrigerator. The strawberries can be coated in filling and frozen up to 2 hours before wrapping. The mochi dough must be made fresh and used immediately while still warm and pliable, it cannot be made ahead and reheated successfully.
More Japanese Desserts Recipes
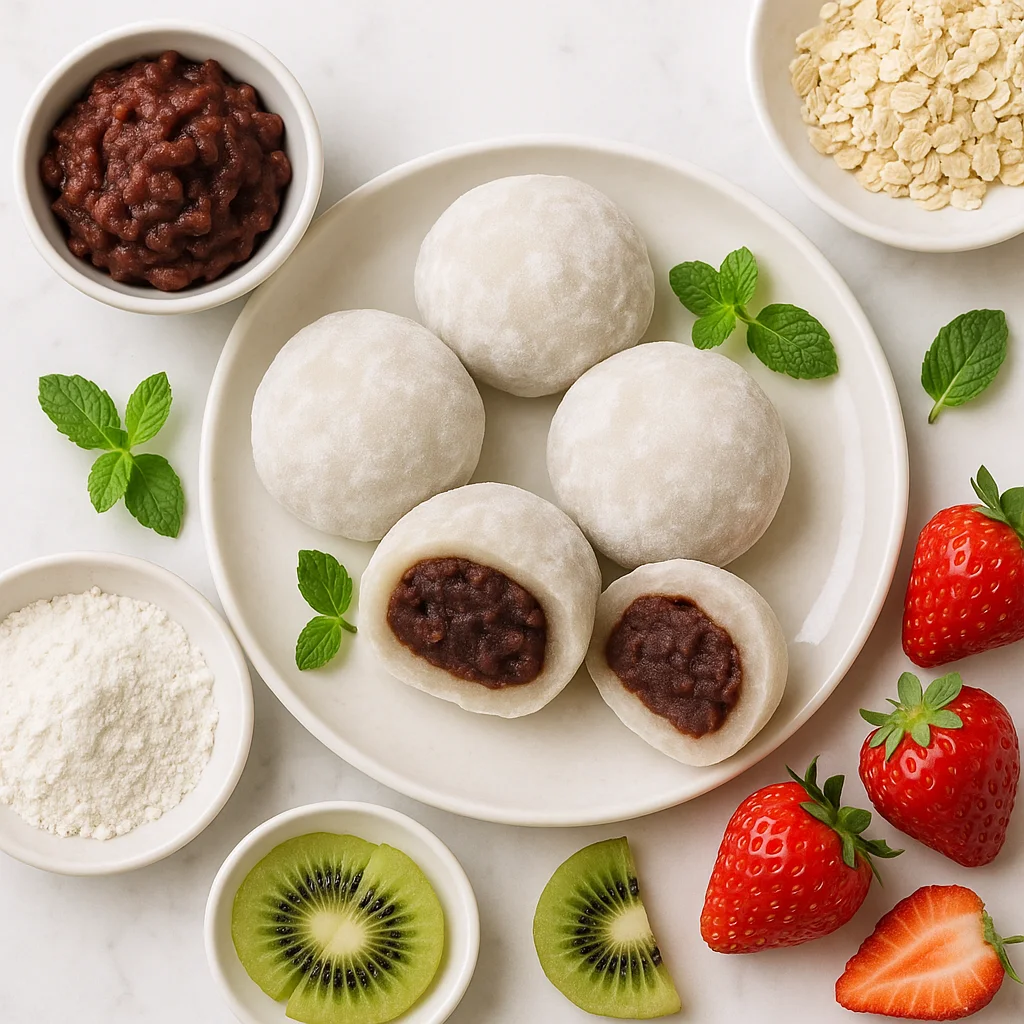
Healthy Daifuku Mochi Recipe with Red Bean Paste (Lower Sugar)
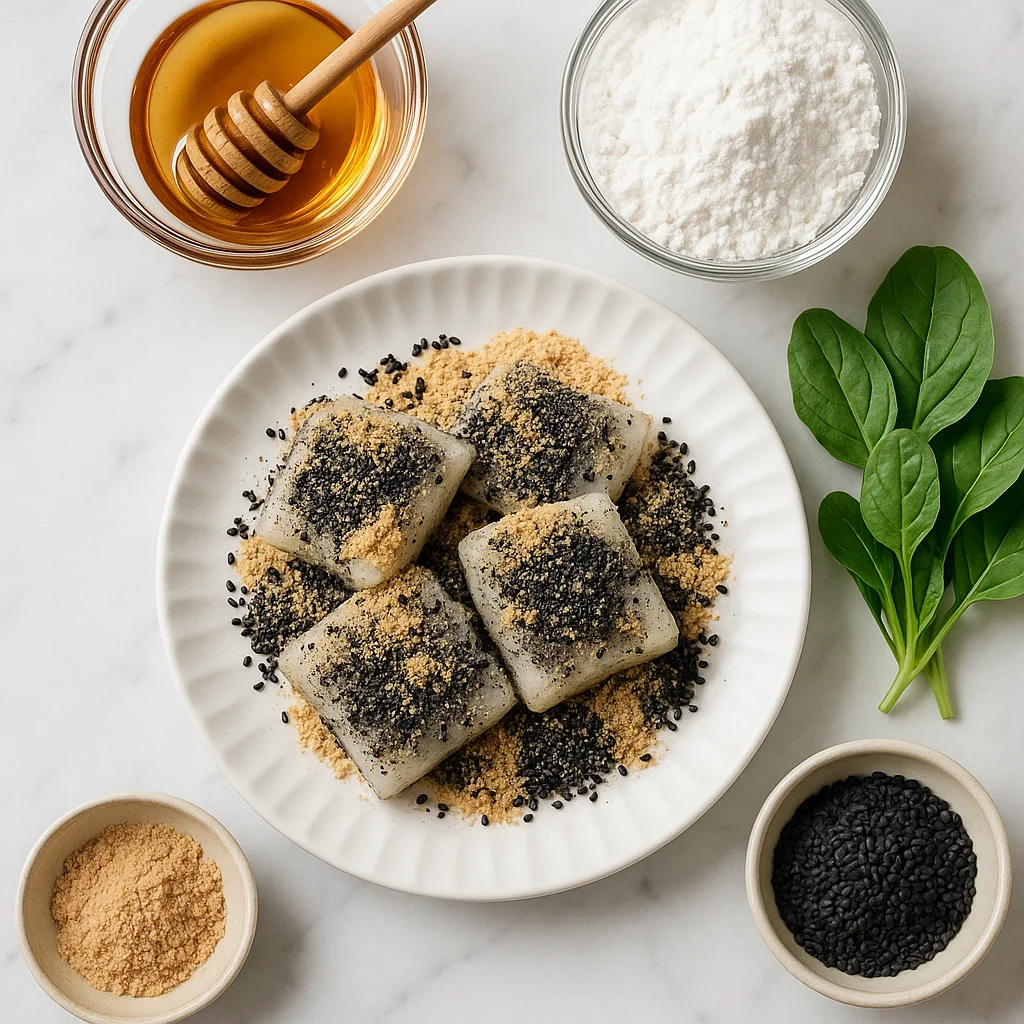
5-Minute Microwave Mochi Recipe with Honey and Black Sesame
Raindrop Cake Mizu Shingen Mochi Agar Agar Recipe with Coconut Water and Matcha Drizzle